Skip to content
How are plush toys made from a drawing, mascot, or character concept? A professional custom plush toy manufacturer turns the idea into a production-ready product through design review, pattern making, sampling, material preparation, sewing, stuffing, quality control, and packaging.
This guide explains the complete plush toy manufacturing process in nine practical steps. It is written for brands, retailers, designers, licensing teams, and creators planning an OEM or ODM plush project.
The Custom Plush Toy Manufacturing Process at a Glance
- Define the product brief
- Review the artwork and manufacturing feasibility
- Select fabrics, colors, and accessories
- Create the plush pattern
- Make the first prototype
- Review, revise, and approve the sample
- Prepare materials and cut fabric for bulk production
- Sew, embroider, stuff, and assemble the toys
- Inspect, pack, and ship the finished order
1. Define the Product Brief
Every successful custom plush project starts with a clear brief. The manufacturer needs to understand the character, finished size, expected quantity, target market, intended age group, packaging, and delivery schedule.
A useful brief normally includes front, side, and back artwork; Pantone colors when available; special details such as clothing or accessories; and the preferred hand feel. If the design is not final, an ODM plush toy factory can help refine proportions and production details before sampling.
2. Review the Artwork and Manufacturing Feasibility
A two-dimensional character cannot always be copied directly into fabric. Designers and pattern makers first review the artwork to decide how the shape can be divided into sewable panels.
At this stage, the team checks small details, balance, facial expression, embroidery areas, accessories, and construction risks. Very thin limbs, tiny decorative parts, or complicated color changes may need adjustment. Resolving these issues early reduces sample revisions and helps keep the final product within budget.
3. Select Fabrics, Colors, and Accessories
The fabric determines much of a plush toy’s appearance and touch. Common options include short plush, minky, velboa, fleece, faux fur, and other specialty textiles. The best choice depends on the character, target price, age grade, and sales market.
The factory also selects thread, embroidery colors, filling, labels, eyes, sound modules, clothing, and packaging materials. Materials should be confirmed before the final sample because a change in pile length, stretch, or thickness can alter the shape of the toy.
4. Create the Plush Pattern
Pattern making is one of the most skilled parts of plush toy manufacturing. A pattern maker converts the character into flat fabric pieces that create the correct three-dimensional form after sewing and stuffing.
The pattern controls the head shape, body proportions, limb position, seam lines, and overall stability. Experienced pattern makers often adjust curves and seam allowance by hand, then test how the form changes after stuffing.
5. Make the First Plush Toy Sample
After the pattern and materials are ready, the sample team cuts the fabric, applies embroidery or printing, sews the pieces, adds filling, closes the seams, and finishes the toy by hand.
The first sample is used to evaluate the character likeness, dimensions, colors, softness, expression, and construction. Complex licensed characters may require more refinement than simple animal shapes. For a detailed cost breakdown, see our guide to what a custom plush toy sample fee includes.
6. Review, Revise, and Approve the Sample
The buyer reviews photos, video, measurements, or the physical sample and sends organized feedback. Revision notes should be specific—for example, “reduce the head width by 8 mm” or “move the embroidered eyes 5 mm closer”—rather than relying only on general comments.
When the design is approved, the final sample becomes the reference standard for bulk production. Confirm the materials, colors, size tolerance, labels, accessories, and packaging before approval. Later changes can affect both price and lead time.
7. Prepare Materials and Cut the Fabric
After sample approval and order confirmation, the factory prepares bulk fabric and accessories. Incoming materials are checked for color, texture, defects, and consistency before cutting begins.
Pattern pieces are arranged to use fabric efficiently while keeping the pile direction consistent. Cutting accuracy matters: small variations can change the finished character, especially on the face, ears, and symmetrical parts.
8. Sew, Embroider, Stuff, and Assemble
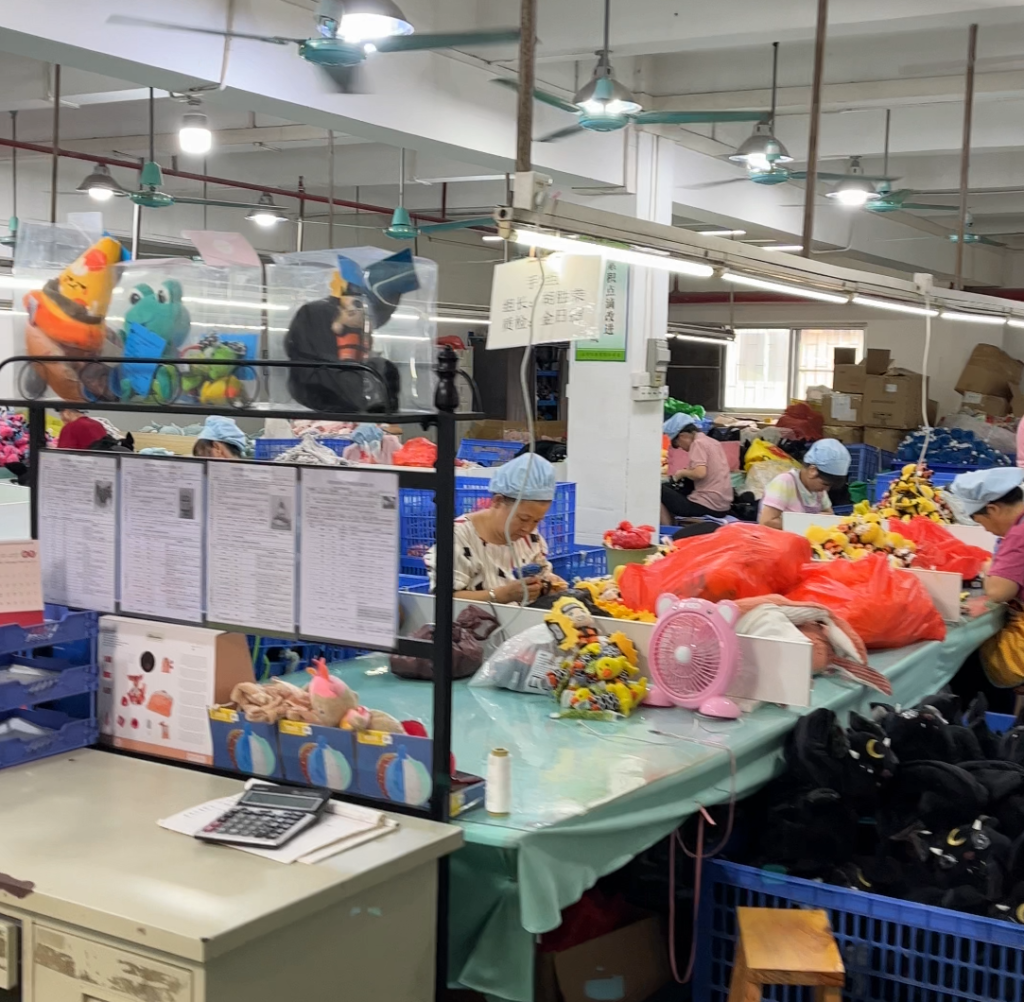
Embroidery or printing is usually completed before the major pieces are sewn together. Production workers then assemble the panels in sequence, add internal components when required, turn the shells, and fill each toy to the approved weight and firmness.
Details such as facial alignment, seam strength, stuffing distribution, and closing stitches are checked throughout production. A reliable factory compares the bulk pieces with the approved sample instead of waiting until the entire order is finished.
9. Inspect, Pack, and Ship the Finished Plush Toys
Final quality control may include appearance checks, measurement, seam inspection, label verification, accessory checks, cleanliness, packaging review, and any market-specific testing required for the project.
Approved toys are packed according to the order specification, which may include polybags, hangtags, display boxes, barcodes, assortments, and carton marks. Carton dimensions and packing quantities should be confirmed before freight is booked.
How Long Does It Take to Manufacture a Custom Plush Toy?
The timeline depends on design complexity, sample revisions, fabric availability, order quantity, testing, packaging, and the production season. A realistic schedule should separate design review, sampling, approval, bulk production, inspection, and shipping.
If you are still planning the budget, our custom plush toy cost and MOQ guide explains the main pricing factors. Share your target launch date with the factory before sampling so the team can identify schedule risks early.
What to Send a Plush Toy Manufacturer
- Character artwork or reference photos
- Desired finished size
- Estimated order quantity
- Preferred fabric, colors, and hand feel
- Embroidery, printing, clothing, or accessories
- Packaging requirements
- Destination country and intended age group
- Target delivery date
Clear information helps the manufacturer quote accurately and recommend practical options. If you are comparing suppliers, use this checklist for finding a reliable plush toy manufacturer.
Frequently Asked Questions
Can a plush toy be made from only a drawing?
Yes. A custom manufacturer can usually begin with a clear drawing or character sheet. Multiple views and color references make it easier to reproduce the design accurately.
What is the difference between OEM and ODM plush toys?
OEM production follows artwork or specifications supplied by the customer. ODM service adds design and development support when the concept still needs to be refined for manufacturing.
Why does a plush toy need a sample before mass production?
The sample confirms the pattern, shape, materials, colors, dimensions, embroidery, stuffing, and construction. It gives both the buyer and factory an approved standard for bulk production.
Turn Your Character Into a Custom Plush Toy
A controlled manufacturing process keeps creative details, cost, quality, and delivery aligned. Send us your artwork, target size, quantity, destination market, and schedule to discuss your custom plush project.